

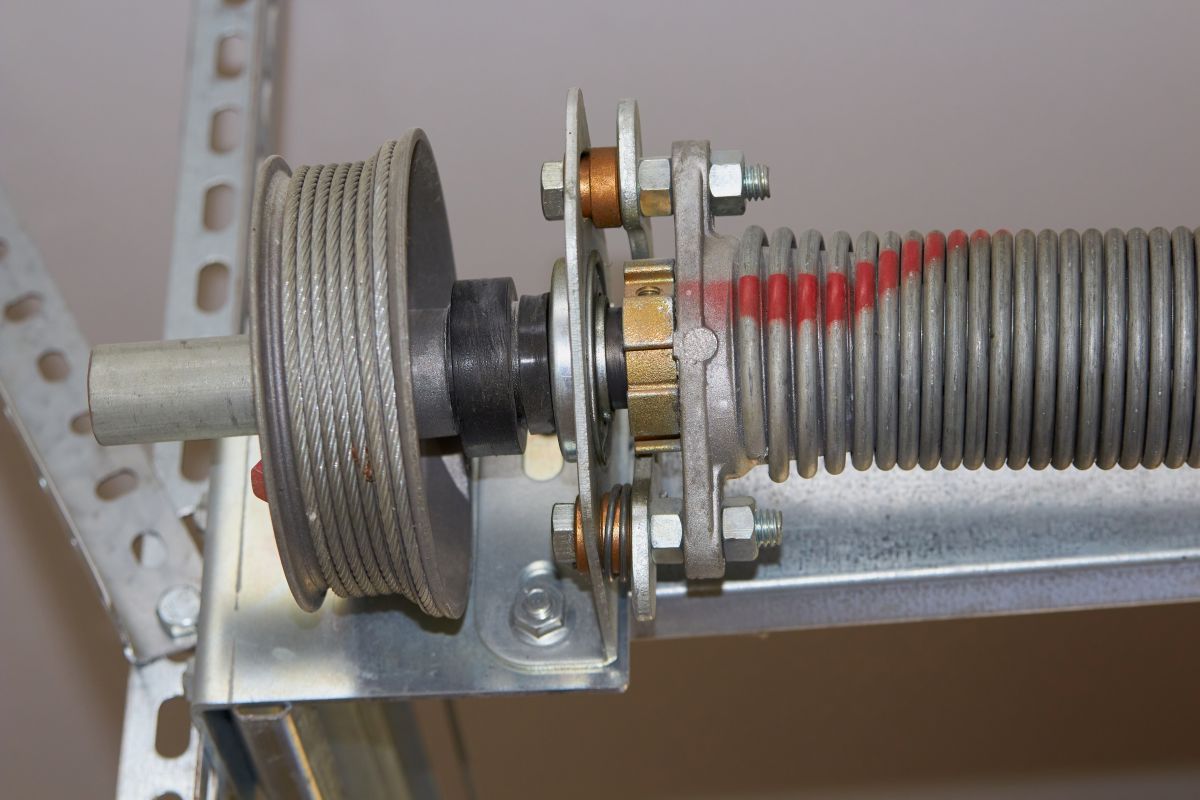
Learning how to replace a garage door spring starts with one essential truth: this is a job for a trained professional, not a do-it-yourself project, because garage door springs hold enough tension to cause serious injury. This guide walks through the five steps a qualified technician follows to replace a spring safely so you understand exactly what the work involves and why it demands specialized tools and training. For Syracuse homeowners dealing with a broken spring, knowing the process helps you recognize quality work and understand what you are paying for.
- The real process: The five steps a professional follows to replace a garage door spring correctly and safely.
- Why not DIY: The specific dangers that make spring replacement one of the riskiest home repairs.
- What to expect: How to identify a broken spring and what professional service involves.
Why Garage Door Spring Replacement Is a Professional Job

Garage door spring replacement is a professional job because springs store enormous mechanical energy that can release violently if mishandled. A single torsion spring counterbalances a door weighing 130 to 350 pounds or more, and releasing that tension without the right tools and technique can cause severe injury.
The Tension That Makes Springs Dangerous
Garage door springs are dangerous because they hold the stored energy needed to lift the heaviest moving part of your home. A torsion spring winds tight to counterbalance the full weight of the door, and when it breaks or is unwound improperly, that energy can release in an instant. Winding bars can kick back, extension springs without safety cables can launch across the garage, and hands or fingers can be caught in the process. This is why the tension itself, not the complexity of the parts, is the core hazard that keeps spring work out of DIY territory.
- Stored energy: A wound torsion spring holds the force needed to lift a 130 to 350 pound door.
- Kickback risk: Winding bars can snap back with force if the spring slips.
- Projectile danger: Extension springs can fly across the garage when they fail.
- Pinch points: Hands and fingers are at risk throughout the winding process.
The Specialized Tools Professionals Use
Professionals rely on specialized tools that most homeowners simply do not own, which is another reason spring replacement is not a DIY task. Winding bars sized precisely to the spring cones, locking pliers, and vise grips let a technician control the tension at every stage. They also match the replacement spring to the door’s exact weight, wire gauge, length, and inside diameter, because the wrong specification creates a dangerous imbalance. Without the correct tools and the correct part, an attempt is far more likely to end in injury or a door that does not work safely.
- Winding bars: Correctly sized bars control the spring tension safely during winding.
- Locking tools: Vise grips and clamps secure the shaft and door in place.
- Correct part matching: Springs are matched to door weight, wire gauge, length, and diameter.
- Safety gear: Eye protection and gloves guard against slips and pinch points.
5 Steps a Professional Follows To Replace a Garage Door Spring
The following five steps outline the process a trained technician uses to replace a garage door spring safely. Understanding each step shows why the work requires expertise and helps you know what quality service looks like.
1. Securing the Door and Releasing Tension
The first step is to secure the door and safely release any remaining spring tension before any parts come off. The technician disconnects the opener, closes the door fully, and clamps it to the track so it cannot move during the work. For a torsion system, they insert winding bars into the winding cone and carefully unwind the spring in controlled increments, keeping firm control of the bars at all times. This controlled release is the single most hazardous part of the job and the main reason it belongs in professional hands.
- Disconnect the opener: The automatic opener is unplugged so it cannot activate the door.
- Clamp the door: Locking pliers secure the door to the track to prevent movement.
- Controlled unwinding: Winding bars release torsion tension in small, deliberate steps.
- Constant control: The technician never lets go of the bars while tension remains.
2. Removing the Broken Spring
Once the tension is fully released, the technician removes the broken or worn spring from the shaft. For a torsion setup, this means loosening the set screws on the winding and stationary cones, then sliding the old spring off the torsion tube. Extension springs are unhooked from the track hangers and pulley system instead. The technician also inspects the cables, bearings, and shaft while the assembly is apart, since these components wear alongside the spring and are far easier to address at the same time.
- Loosen the cones: Set screws on the winding and stationary cones are released.
- Slide off the spring: The old torsion spring comes off the shaft once free.
- Unhook extensions: Extension springs are detached from hangers and pulleys.
- Inspect nearby parts: Cables, bearings, and the shaft are checked for wear.
3. Installing the Correctly Sized Replacement Spring
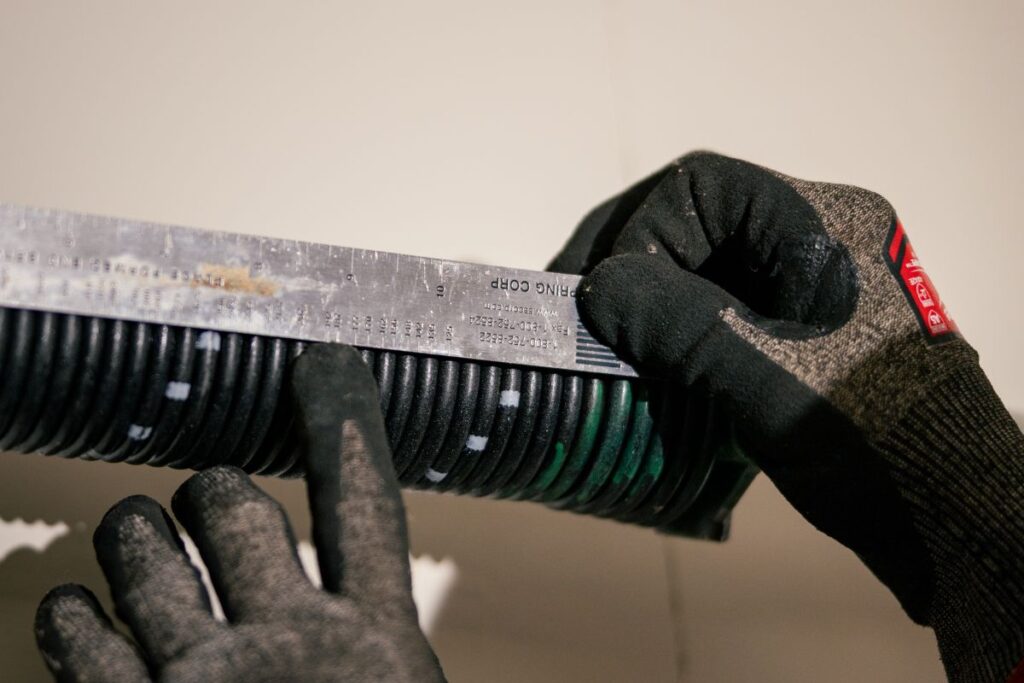
The third step is installing a replacement spring matched precisely to the door’s specifications, which is critical for safe operation. The technician selects a spring with the correct wire gauge, length, inside diameter, and wind direction for your specific door weight. An undersized or oversized spring throws off the balance, straining the opener and creating a safety hazard. The new spring is slid onto the torsion tube and loosely positioned, with the cones set in place but not yet tightened, ready for the winding step that follows.
- Match the specs: Wire gauge, length, diameter, and wind direction must match the door.
- Balance matters: The wrong spring size strains the opener and creates hazards.
- Position the spring: The new spring is slid onto the tube and set in place.
- Prepare the cones: Winding and stationary cones are positioned for winding.
4. Winding the Spring to Correct Tension
Winding the spring to the correct tension is the step that requires the most skill and care in the entire process. Using winding bars, the technician turns the spring a precise number of quarter-turns based on the door’s height and the spring’s specifications, typically around 30 turns for a standard door. Applying too little or too much tension leaves the door unbalanced, so the count must be exact. The technician keeps firm control of the bars throughout and tightens the set screws only once the correct tension is reached.
- Precise turns: The spring is wound a specific number of quarter-turns for the door.
- Follow the specs: Turn count depends on door height and spring specifications.
- Firm control: The technician holds the winding bars securely at every turn.
- Lock the tension: Set screws are tightened only after correct tension is set.
5. Testing and Balancing the Door
The final step is testing and balancing the door to confirm the replacement was successful and safe. The technician removes the clamps, lifts the door manually to check that it stays balanced at various heights, and adjusts the tension if needed. They then reconnect the opener and run the door through several full cycles, verifying that the auto-reverse safety feature works and the door moves smoothly. This testing ensures the spring is properly tensioned and the whole system operates safely before the job is considered complete.
- Manual balance test: The door should hold its position when lifted by hand.
- Fine adjustment: Tension is tweaked if the door drifts up or down.
- Reconnect and cycle: The opener is reconnected and the door tested repeatedly.
- Verify safety: The auto-reverse feature is confirmed to work correctly.
How To Tell If Your Garage Door Spring Is Broken
Knowing the signs of a broken spring helps you call for professional service before the problem gets worse or becomes a safety risk. A broken spring usually announces itself clearly through the door’s behavior and sometimes an audible sign.
Common Signs of a Failed Spring
The most common sign of a broken garage door spring is a door that suddenly feels extremely heavy or will not open more than a few inches. Because the spring counterbalances the door’s weight, a failure leaves the opener unable to lift it properly. You may also hear a loud bang from the garage, which is the sound of the spring snapping under tension. A visible gap in the torsion spring coil is another clear indicator that the spring has failed and needs professional replacement.
- Heavy door: The door feels far heavier than normal or barely lifts.
- Loud bang: A sudden loud noise often signals the spring snapping.
- Visible gap: A separated coil in the torsion spring confirms a break.
- Uneven movement: The door opens crookedly or drops when released.
What To Do When a Spring Breaks
When a garage door spring breaks, the safest response is to stop using the door and call a professional right away. Attempting to force the door open with the opener can damage the motor, and trying to lift the heavy door manually risks injury. Leave the door closed if possible, keep people and vehicles clear, and avoid any DIY repair attempts on the spring itself. A qualified technician can respond, often on an emergency basis, and replace the spring safely with the correct part.
- Stop using the door: Do not operate the opener with a broken spring.
- Keep clear: Keep people and cars away from the door until it is fixed.
- Avoid DIY: Do not attempt to lift or repair the spring yourself.
- Call a pro: A technician can handle it safely, often as emergency service.
Frequently Asked Questions

Can I Replace a Garage Door Spring Myself?
You should not replace a garage door spring yourself, as it is one of the most dangerous home repairs due to the extreme tension springs hold. Without the correct winding bars, clamps, and a spring matched to your door, an attempt can cause serious injury. Always hire a trained professional for spring replacement.
How Long Does It Take To Replace a Garage Door Spring?
A professional typically replaces a garage door spring in about one hour, depending on the door and whether one or both springs are being replaced. Replacing both springs at once, which is often recommended, may take a little longer. A technician can give you a firm timeframe when they assess the door.
Should I Replace One Spring or Both?
Technicians often recommend replacing both springs at the same time when your door uses a two-spring system, because both have similar wear. If one has broken, the other is usually close behind, and replacing both together saves a second service call. Your technician can advise based on the condition of each spring.
How Do I Know Which Spring My Door Uses?
Garage doors use either torsion springs, mounted on a shaft above the door, or extension springs, which run along the tracks on each side. Torsion systems are more common on modern doors and are generally more durable. A professional will identify your spring type and match the correct replacement during service.
Why Did My Garage Door Spring Break?
Most garage door springs break simply from normal wear, since they are rated for a set number of open-and-close cycles. Cold Syracuse winters, rust, and lack of lubrication can shorten a spring’s life. Regular professional maintenance helps springs reach their full lifespan before they fail.
Is It Safe To Use My Garage Door With a Broken Spring?
No, you should not use a garage door with a broken spring, because the opener and remaining components are not designed to handle the full weight alone. Operating it can damage the motor or cause the door to fall. Stop using the door and call a professional for prompt replacement.
Why Genson Overhead Door Is Your Trusted Syracuse Spring Replacement Expert
When your garage door spring breaks, replacing it safely is a job for trained professionals, and Genson Overhead Door handles spring replacement for Syracuse homeowners with the right tools, the correct parts, and a careful process from start to finish. Our technicians match each spring precisely to your door, wind it to the exact tension, and test the balance and safety features so your door operates smoothly and safely. Because a broken spring can leave your car trapped and your garage unsecured, we offer emergency repairs to get you back up and running quickly, along with flexible financing to fit the work into your budget. If your garage door spring has failed, reach out to Genson Overhead Door today for a free quote and expert spring replacement you can trust.
